Pages

Monday, October 1, 2012

Fashion-Disaster Prevention

I am arguably the clumsiest person on the planet. I have a perpetual bruise on my hip from bumping into my desk on a daily basis, burns on my fingers from my curling wand, and my roommate will testify to the fact that I literally run into the doorframe twice a week because apparently my depth perception is really, really off.
My clumsiness doesn't stop at personal bodily harm, of course. No, it also extends into my wardrobe. This morning I got my coffee, spilled some on my dress, and then promptly sat down on a slightly damp wicker chair that left a tell-tale pattern on the back of my skirt. Years of this kind of behavior has taught me a lot, however. I've pretty much developed a accident-recovery kit that I keep with me at all times, so that I can at least appear to be a put-together individual.


  1. Bottle of Water: In addition to my refillable water bottle for drinking water, I generally keep one of those plastic tiny water bottles in my purse for stain management. I've generally found that, for small stains, rubbing cold water directly on the stain with a paper towel gets rid of it completely, without having to buy and special pens or other stain remover devices.
  2. Nail glue and backup nails: I bite my nails pretty badly, which is obviously really gross, so years ago I discovered that wearing acrylic nails completely wiped out that bad habit. I really just use the cheap drugstore kind, itty-bitty baby ones because my hands are so tiny, with plain white french tips. They look clean and natural, but I am not that careful, and sometimes I'll glance at my hand during the day and realize that one of my fingernails looks much sadder than the others. To avoid that tacky problem, I finally learned to keep a tiny ziplock bag with nail glue and two or three replacement nails on hand for a quick fix. This seems obvious, but for the longest time I would just misplace all the extra nails and have to go buy new ones way, WAY too often.
  3. Safety Pins: While I rarely have to use these myself (of course, now that I've said that, I'll need about 6 of them today), I have made many friends by carrying safety pins with me. There's always someone with a broken zipper, ripped seam, or broken strap who will become your new best friend when you have a safety pin on hand to fix her fashion emergency. 
  4. Hair Spray: Besides the obvious use, hairspray can also pull double duty and help eliminate static. This is especially helpful for dresses that cling just a little too well to your figure.
  5. Needle and Thread: Actually, keep a small assortment of basic colored thread on hand (black, white, brown, beige) to better match an outfit in case of a loose button or seam. I've found these supplies especially useful when I have a wrap dress that isn't quite covering everything on a windy day.  A well placed stitch or two can prevent any accidental indecent exposures or embarrassing mishaps.
  6. Clear Nail Polish: This is probably the most important thing in my bag. Coat costume jewelry in it to avoid getting stains on your skin from the less than quality metals, and use it to stop your tights from fraying, as well as it's original purpose. 

Wednesday, August 15, 2012

Fall Preview Wishlist: Forever 21

A quick look at what I'm drooling over to usher in the fall semester. This is a little premature, considering that here in Florida it is still well above 80 degrees each day, but a girl can dream, right?


<3 Kat

Mega Clutch Tutorial

I got to go home from babysitting early today and ended up pulling into the parking lot of Jo Ann fabrics, which is usually a mistake because I end up buying scrapbook paper (I've never made a scrapbook in my life) and sequined elastic and things of that nature that I really don't need. But while I was wandering up and down the fabric aisles, lamenting my lack of savings account, I came across the bin that holds their "remnants", basically the end of the bolt that didn't get sold at full price. I ended up buying a fairly large piece of camel-colored vinyl, raced home, and immediately began work on a GIANT CLUTCH.
It's unreasonably big, and I love it. My boyfriend always makes fun of me for buying bags that are disproportionate to my body size.This definitely falls into that category.
My baby hands are dwarfed by this bag. Ugh.


You'll need:
  • A large piece of vinyl or leather
  • Thread in a matching color
  • Scissors
  • Needle
  • Sewing Machine (Optional, but hand stitching the whole bag could get tiresome)
Cut your remnant into 3 identical rectangles. The size can vary depending on how much material you have, but mine were 12" x 6". 
Sew two of the rectangles together along the bottom edge, with the "pretty" sides of the material facing out. *Here's the other reason you probably want to use a machine; I redid all the seams twice to make sure they were secure, and it was very difficult to sew through 2 or more layers by hand.
DON'T sew the side yet, it'll make your life a lot more difficult later if you do. (Trust me, I didn't think it through and it forced me to do way more hand sewing later on.)

On the third rectangle, fold down the top third (2" on my scale) and secure it on both side and the loose edge.

Grey line represent where seams should be sewn
Attach the third rectangle to the back of the first two that you're sewn together, so that the flap can fold over the top of the bag to close it. This means you'll have to sew the "flap piece" two thirds of the way up the back of the other. This is really hard to explain but when you have the pieces in your hand it's pretty obvious that this is the only way to sew it. 
 NOW sew up the sides of the bag. You should be sewing through three layers at some point, and you'll be glad that you're not having to do this by hand like I did. Be sure not to sew the "flap" because then your bag won't open.

At this point you should basically have your bag finished. I added 2 dots of Velcro instead of sewing in a clasp. I also cut out a 1"x1" square from my scraps, and made a tiny "K" which I hand sewed onto the bottom corner of the clutch to personalize it a little.


I can't wait to carry this somewhere. My favorite part of making new pieces is getting to tell people "Thank you, I made it myself!" when they compliment it.
Margaery loves fashion. 
Drumroll, Please.
Final Price: $2.89


<3 Kat

Monday, August 13, 2012

Closet Case

9 days from now I'm headed back to school and moving into my very first apartment with two of my best friends, and to say that we are excited to start decorating the space would be the biggest understatement of the century. I have spent far too many hours on Pinterest boards, figuring out the best way to arrange everything from flowers to shoes, and probably will never be able to finish all the projects I've got going on right now.
I thought that today I would share some of the things I've got in the works to organize my closet. I'm one of those people who always start the year with resolutions to "be super organized this year" and "know where to find everything" and then by February I'm back to digging through mountains of shoes for my favorite heels. Nevertheless, I'm vowing to at least make an effort to keep my closet in check this semester.


1. Rack City


A Beautiful Mess has a really simple, basic tutorial for a garment rack that is more steady than the rolling kind you can often buy. I'd really like this in addition to my closet because, well, I have too many clothes, and I like to display them. I have to confess, though: my dad is making this for me for my birthday because, when it comes to hardware, I'm a little bit clueless.


2. Hats Off


Also from A Beautiful Mess is this suggestion for  storing and displaying hats, of which I have too many. (I bought a new one today. It's an addiction) This is literally the simplest thing on the planet, but it looks really cute and makes it easy to grab a hat and run on a bad hair day.


3. Boxed In
One problem with our apartment is that the walls are ugly. There are a few places where the paint has been peeled right off by previous tenants. I know a lot of people who have encountered similar issues, and one really good way to cover the spots while also creating functional wall decor is to turn a shadowbox into a jewelry display case. Shadow boxes can be found lots of places (try Target) and it's really easy to glue some wrapping paper or scrapbook paper to the back, then use pushpins to hang your jewelry inside the frame. 


Stay tuned, I'll try to get lots of pictures on moving day and continue to update you all with the process, as well as other projects I'm working on :]
<3 Kat

Monday, August 6, 2012

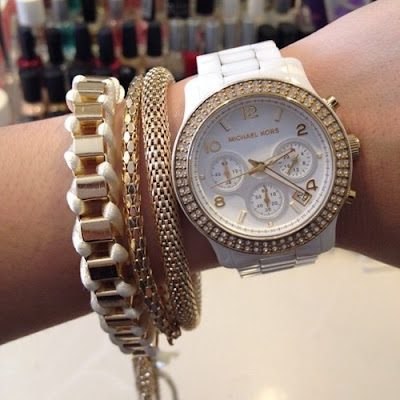
White and Gold

Recently I've been seeing gorgeous combinations of white and gold everywhere. Nothing shows off a summer tan like a crisp white blouse or dress, and there's something about pairing that with gold accessories that is luxurious and current.


I'm also in LOVE with sequin tops. I have an idea in mind for a DIY project....just gotta keep an eye out for the right fabric
Plus, this cheetah print bag paired with sequins is so great. I love using a print or texture as if it were a neutral (in this case, the sequined blouse serves as a base.)


More gold and white jewelry to drool over. I'm always coveting a new Michael Kors watch, and this one is so pretty. And this statement necklace would look gorgeous paired with just about anything. 


I head back to school in just a few weeks, and away from the ocean, which is heartbreaking, but summer is far from over here in Florida. It'll maintain an average of about 95 until early October. So I think I can justify buying just one more bathing suit. Especially if I can find one as cool as this. 


I fully intend on going in search of some pretty gold accessories this week, to pair with a white sundress I found hat my sister had stolen and was hiding from me a few days ago. Keep an eye out for that coming soon.
 <3 Kat

Saturday, August 4, 2012

Weekend Obsessions

Watching: 
The Kennedys is on Netflix. I seem to remember this show getting bad reviews when it was on TV, but I love it. I basically love anything 60's as is, Jackie is one of my fashion idols, and the casting for this show is pretty good, appearance wise.  It also made me cry (I know, this is ridiculous, it's not like anything was surprising!) I balanced out the implied laziness of watching an entire TV series in two days by organizing my closet while I did so. See....I can be productive!


Listening:
I harbor a secret obsession with 80's rock, and am only slightly embarrassed to admit that I've seen Rock of Ages twice already. I bought the soundtrack, and I don't think I've stopped listening to it since. I deny all accusations of singing "Any Way You Want It" loudly into my hairbrush. It never happened.
But for real, Mary J. Blige brings down the house!


Reading:
Okay, this doesn't qualify as reading. I'm already breaking my own rules. But this is my blog, so it's allowed [:
Plus, this discovery is awesome. Earth shattering. Life altering. World changing.
Well, maybe not. But it's still pretty smart. F-Yeah Movie Workouts is a Tumblr dedicated to workouts to accompany all your favorite TV shows and movies. It works like a drinking game, but instead of taking a shot every time a toddler in a tiara calls someone "Honey Boo Boo Child", you do ten squats. Much more beneficial results ensue. So instead of eating my weight in animal crackers while I watch Americas Next Top Model reruns, I can turn it into a *better* use of my time. I really suggest checking it out. Because if you're like me, you definitely don't have the attention span for P90X, and you'd rather have a plot-line than washboard abs. Most days.


Eating:
I am a closeted foodie, and my favorite is Indian food. I especially enjoy setting my heart on fire by ordering my chicken tikka masala with "Indian" level spicy-ness instead of the more practical "Mild" or "American" options, a habit which often impresses the waiters but usually leaves me wishing to have my heart surgically removed from my chest and replaced with an iceberg.
Also, chicken tikka masala is considered Britain's National Dish (Really? Not fish and chips? Tea and scones? Can you tell I have minimal knowledge of British cuisine?) And unless you are living under a rock, you are fully aware of the descent of MORE THAN 140,000 ridiculously athletic individuals upon London as of late. What better way to support the Olympians in their quest for glory than sitting on your couch and stuffing your face with the host country's favorite dish.
I like this recipe from Picture the Recipe because, well, it has lots of pictures.


Wearing:
My newest bag is this pale blue Merona satchel from Target, It was originally $26.99 but I pulled it off the clearance shelf for $8.24. I love this color, it's kinda my newest obsession, and the polka dots are subtle and cool. I'm very excited.
\
Off to attempt to organize my closet. 
<3 Kat

Friday, August 3, 2012

Domestic Goddess

Aside from sewing, I am severely lacking in domestic skills. I often forget to add key ingredients to recipes, even if those recipes come from the back of a box, and more often than not I burn everything anyway. It's a trait that everyone from my father to my boyfriend like to make fun of. Still, I'll be moving into my first apartment with a kitchen this month, and so I'm going to make some sort of attempt to cook things besides Easy Mac and Instant Rice.
If I'm going to have to slave over a hot stove, I definitely need an adorable apron to help me channel my inner Julia Child. This project wasn't really planned but I'm totally thrilled with how it ended up.
Ignore the stuffing pictured here, this is a picture I took for my pillow tutorial :]


I actually just used scrap fabric for this apron. I originally used the fabric for a pillow, then when I looked at the remaining scraps I decided I could make an apron with them.
You'll need:

  • large rectangle of fabric (about 12"x24")
  • a long strip of fabric (2" wide and as long as your arm-span)
  • scissors
  • thread in a coordinating color
  • a sewing machine (this could also be hand sewn but I'm just not that patient)
  • iron and ironing board
  • two small squares of contrasting fabric (3"x5" or so)
Take the large rectangle and fold it like so:
Iron the flaps down, and also iron down about a 1/2 inch hem across the top and sides, (Ironing your hems before you sew decreases your chances of messing up a hem or making it uneven) then simply hem around. Cut off any excess fabric if necessary.
Next hem both sides and the ends of your long strip so that it is now 1 inch thick. This is the waist of your apron. (If you use a wide ribbon for the waist instead, no hemming is necessary.)
Sew the waist band across the top of the apron, pattern out, and make sure it is centered.

Of course, your apron needs some pockets to hold spoons and measuring cups in. (Who am I kidding? My pockets are for holding Starbursts.)
The pockets are easy. Simply iron and hem three of the four sides, then sew those three edges onto the front of your apron wherever you want them.


I'm really in love with the finished product. And while I can't promise that I will be making any gourmet meals anytime soon, you can bet that I'll be wearing it next time I force my boyfriend to come over and eat grilled cheese off of fine china. 

<3 Kat